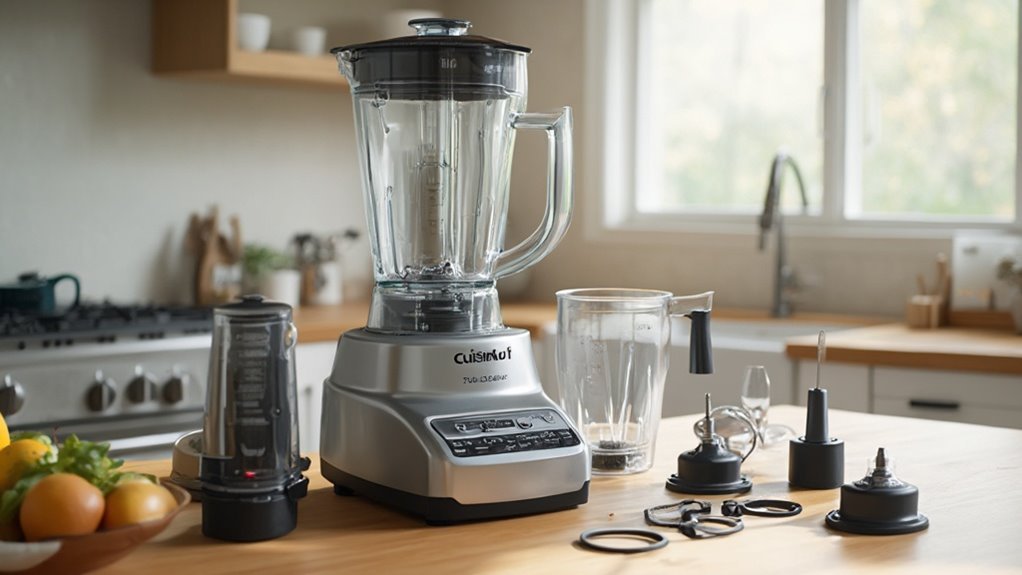
To master your Cuisinart blender's performance and maintenance, grasp its key parts: the base, jar, blade assembly, lid, and control panel. Identify noise, leaks, or misalignment by inspecting the gaskets and blade tightness. Equipped with tools like a microfiber cloth and precision screwdriver, you can replace blades or gaskets efficiently. Follow a maintenance schedule for longevity. Gain insights on troubleshooting motor issues and enhancing blender functionality to maximize efficiency and safety.
Key Takeaways
- Identify common Cuisinart blender parts: base, jar, blade assembly, lid, and control panel.
- Use diagrams to understand the assembly and disassembly of Cuisinart blender components.
- Follow step-by-step instructions for replacing blades and maintaining gaskets effectively.
- Employ essential tools like precision screwdrivers and a good-quality wrench for maintenance.
- Conduct regular inspections to identify and fix issues like noise and leaks promptly.
Understanding Your Cuisinart Blender's Anatomy
To effectively use your Cuisinart blender, it's vital to understand its anatomy thoroughly.
Begin with a blender components overview: the base, jar, lid, blade assembly, and control panel. Each part plays an important role.
The base houses the motor, providing power necessary for blending. The jar, typically made of glass or durable plastic, contains ingredients during operation.
The blade assembly, located at the jar's bottom, is responsible for cutting and blending efficiently. The lid guarantees contents remain securely inside, preventing spills.
Finally, the control panel offers various speed settings, allowing you to customize blending intensity.
Understanding these blender part functions empowers you to maximize performance, guaranteeing your culinary creations are seamless and unrestricted.
Embrace this knowledge for ultimate blending freedom.
Common Issues and How to Identify Them
Having a firm grasp of your Cuisinart blender's components sets the stage for effectively addressing common issues.
Blender noise issues often signal worn bearings or misaligned blades. When your blender's whirring becomes a rattling cacophony, inspect the blade assembly and motor coupling. Misalignment or wear in these areas causes excessive noise, hindering performance.
Leaking problems usually stem from improper assembly or worn gaskets. Examine the rubber gasket closely; confirm it sits snugly between the blade assembly and the jar base. If leaks persist, replace the gasket to prevent further damage.
Additionally, verify that the jar is securely seated on the base. By identifying these issues promptly, you'll maintain your blender's efficiency, confirming it remains a reliable kitchen companion.
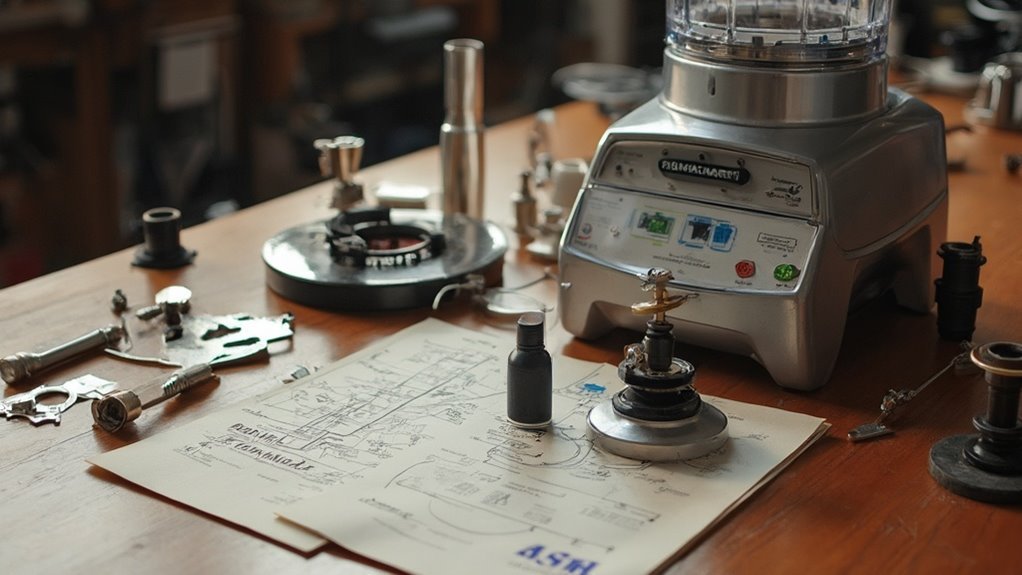
Essential Tools for Blender Maintenance
Proper maintenance of your Cuisinart blender requires a set of well-chosen tools, guaranteeing it runs smoothly and efficiently.
Ensure your Cuisinart blender runs smoothly with the right maintenance tools.
Start with a microfiber cloth for gentle yet effective blender cleaning. This won't scratch surfaces and is ideal for wiping down both the exterior and intricate parts.
You'll also need a small, soft-bristled brush to clean hard-to-reach areas, like seals and blades.
Keep a set of precision screwdrivers on hand for any necessary disassembly.
Invest in a good-quality wrench to tighten loose components.
Make sure your tool storage is organized and accessible, so you're never searching for what you need. A dedicated box or drawer with compartments works well.
Step-by-Step Guide to Replacing Blender Blades
To replace your Cuisinart blender blades, start by verifying the blender is unplugged and safely remove the old blades using a wrench for a secure grip.
Next, carefully align the new blades and screw them into place, taking care to avoid cross-threading.
Finally, check that the blades are properly aligned and securely fastened to guarantee peak blender performance and safety.
Removing Old Blades
Start by making sure the blender is unplugged to prevent any accidents. Safety precautions are essential.
Begin by removing the blender jar from the base. Turn the jar upside down, revealing the blade assembly. Hold the jar firmly, and use a cloth or thick glove to grip the blade assembly securely—this guarantees protection from sharp edges.
Rotate the blade assembly counterclockwise to loosen it; this is the core of effective blade removal techniques. If it's tight, use a wrench with caution.
Once loosened, carefully lift the blade assembly out of the jar. Inspect for any signs of wear or damage. Confirm all parts are accounted for, setting them aside for disposal or recycling.
Installing New Blades
Blender maintenance begins with the precise installation of new blades. First, identify your Cuisinart model and verify the correct blade types are on hand. Each model may require specific blades, so check compatibility.

Start by placing the gasket on the blade assembly. This guarantees a secure seal and prevents leaks. Carefully insert the new blades into the designated slot at the base of the pitcher. Hold the blade assembly steady, and twist it clockwise to lock into place securely.
Apply firm pressure but avoid overtightening, which could damage components. Regular blade maintenance keeps your blender performing effectively and extends its lifespan. With the right tools and attention to detail, you'll verify your Cuisinart blender operates smoothly every time.
Ensuring Proper Alignment
While replacing blender blades, guaranteeing proper alignment is essential for ideal performance and safety.
Begin by securing the blender base on a stable surface. Use alignment tools such as a flat-head screwdriver to gently adjust the blade assembly. Ensure the blades sit parallel to the container bottom, preventing uneven wear.
Implement alignment techniques by rotating the blades manually, checking for smooth, unhindered movement. Pay attention to any resistance or noise, indicating misalignment.
Tighten the blade assembly with a wrench, ensuring a snug fit without over-tightening. Confirm the alignment by placing the pitcher back on the base; it should lock effortlessly.
This precision guarantees your blender operates efficiently, giving you the freedom to create culinary masterpieces without interruption or risk.
Motor Troubleshooting and Repair Tips
If your Cuisinart blender's motor isn't functioning ideally, identifying the issue precisely is crucial before attempting repairs.
Start by examining for common motor issues which can be resolved without professional help.
- Check the power source: Verify your blender is plugged in and the outlet is functioning.
- Inspect the motor base: Look for any visible damage or burnt smell indicating motor replacement might be necessary.
- Test the motor coupling: If it's loose or worn out, it could hinder motor performance.
- Examine motor brushes: Worn brushes can cause poor motor function and should be replaced.
Understanding these elements empowers you to address motor problems confidently, allowing you to decide whether a simple fix or complete motor replacement is needed.
Embrace the independence of DIY repairs and keep your blender running smoothly.
Replacing and Maintaining Blender Gaskets
To effectively replace and maintain your blender's gaskets, start by identifying any signs of damage such as cracks or warping.
Once you've confirmed the need for replacement, guarantee proper gasket installation by aligning it correctly within the sealing groove, avoiding any twists.
Regular maintenance, including cleaning and inspecting for wear, will prolong the gasket's life and ensure peak blender performance.
Identifying Damaged Gaskets
Occasionally, a blender's gasket may become worn or damaged, impacting its performance and safety. To identify issues, first familiarize yourself with the various gasket types and materials.
Rubber and silicone are common gasket materials, each with distinct characteristics influencing durability and flexibility.
Look for signs of damage, such as:
- Cracks or tears: These may appear in any gasket type, hindering its sealing ability.
- Warping: Check if the gasket has deformed, which can compromise its fit.
- Discoloration: This might indicate wear or chemical breakdown, especially in rubber.
- Leaking: Notice any liquid seeping during blending, as it suggests a faulty gasket.
Proper Gasket Installation
Proper gasket installation is vital for guaranteeing your blender functions efficiently and safely.
First, identify the correct gasket types for your specific Cuisinart model. These could be flat or beveled, with materials ranging from rubber to silicone.
Once you've secured the right type, clean the blade assembly thoroughly. This prevents debris from interfering with the installation.
Place the gasket over the blade assembly, confirming it sits evenly in the groove. It's important to avoid twisting or stretching it, as this can lead to leaks.
Next, carefully align the blade assembly with the base, tightening it clockwise until secure. This installation technique guarantees a snug fit, preventing spills and enhancing performance.
Gasket Maintenance Tips
When maintaining your Cuisinart blender, guaranteeing your gasket is in top condition is essential for ideal performance and safety.
Regular inspection and care prolong the gasket lifespan, preventing leaks and guaranteeing a smooth blend. Here's how you can maintain it effectively:
- Inspect Regularly: Check for cracks or deformation. Damaged gaskets compromise sealing.
- Clean Properly: Use warm, soapy water to clean gasket materials, avoiding harsh chemicals that cause deterioration.
- Replace When Needed: If the gasket shows wear, replace it promptly. A timely replacement guarantees continued efficiency and safety.
- Store Correctly: Avoid exposing the gasket to extreme temperatures. Store in a cool, dry place to maintain elasticity.
Best Practices for Long-Lasting Blender Performance
To guarantee your Cuisinart blender serves you efficiently over the years, it's essential to adopt certain best practices for maintaining its performance. Start with regular maintenance, focusing on blender cleaning tips and ideal usage to prevent wear. Clean the blades immediately after use to avoid residue buildup. For ideal usage, avoid overloading the jar and make certain liquids are added first to ease blending.
Here's a quick reference table:
| Task | Frequency |
|---|---|
| Blade Cleaning | After each use |
| Motor Base Wipe-down | Weekly |
| Gasket Inspection | Monthly |
| Full Unit Inspection | Bi-annually |
| Container Replacement | Every 2-3 years or as needed |
Conclusion
You've now navigated the intricate anatomy of your Cuisinart blender, like a skilled captain steering through a technical sea. By identifying common issues, mastering blade replacements, and troubleshooting motor quirks, you've equipped yourself with the essential tools for maintenance. Remember, replacing and maintaining gaskets is vital for sealing performance, and following best practices guarantees your blender runs smoothly for years. With this knowledge, you can confidently tackle any challenge your blender throws your way.