To fix a Maytag dishwasher not draining, start by inspecting the dishwasher filter, cleaning out any debris, and securely reinstalling it. Check the drain hose for kinks or blockages, straightening any bends. Examine connections to the air gap or garbage disposal and guarantee the knockout plug is removed. Verify the drain pump‘s functionality using a multimeter. Diagnosing these areas thoroughly can restore your dishwasher’s efficiency. Stay tuned for more insightful solutions and tips.
Key Takeaways
- Inspect and clean the dishwasher filter to remove food debris and buildup.
- Check the drain hose for kinks or blockages and straighten any bends.
- Examine the air gap or garbage disposal connection for debris or clogs.
- Test the drain pump for malfunctions and ensure the impeller moves freely.
- Evaluate the control board for damage or burnt spots, and seek professional help if needed.
Inspect the Dishwasher Filter
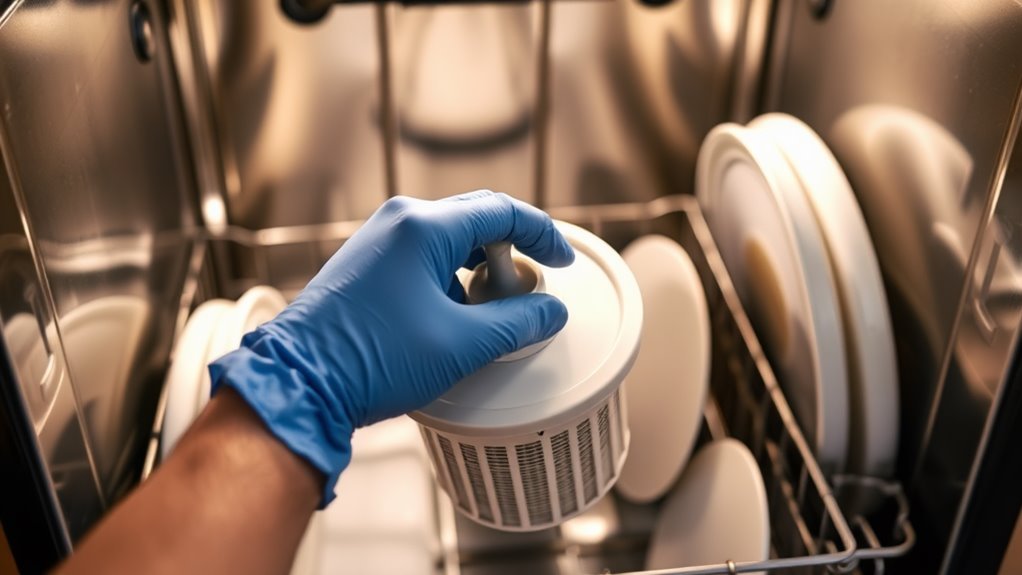
To begin addressing the issue of a Maytag dishwasher not draining, focus on inspecting the dishwasher filter.
Start by removing the bottom dish rack to access the filter at the bottom of the tub. Proper filter maintenance is key, so check for any food debris or buildup. A clogged filter can restrict water flow, causing drainage issues.
Access the filter by removing the bottom dish rack; a clogged filter can restrict water flow and cause drainage issues.
Carefully remove the filter by twisting it counterclockwise, then lift it out. For effective filter cleaning, rinse under warm water, using a soft brush to dislodge stubborn residues.
Reinstall the filter, ensuring it’s securely in place. Regular maintenance empowers you to keep your dishwasher in top condition, ensuring it functions efficiently and grants you the freedom from unnecessary repairs and disruptions.
Check the Drain Hose for Kinks or Blockages
One critical step in resolving a Maytag dishwasher not draining is to check the drain hose for any kinks or blockages.
Start by turning off the power to guarantee safety. Carefully pull the dishwasher away from the wall, revealing the drain hose. Inspect the entire length of the hose, feeling for any kinks that might impede water flow. Straighten any bends you find to restore proper drainage.
For blockage prevention, disconnect the hose from both the dishwasher and the sink, and run water through it using a garden hose. This guarantees no debris or buildup remains inside.
Regular drain hose maintenance can greatly extend your dishwasher’s lifespan and keep it running smoothly. Once clear, reconnect everything and test for proper drainage.
Examine the Air Gap or Garbage Disposal Connection
After verifying the drain hose is free from obstructions, it’s important to examine the air gap or garbage disposal connection. Begin by inspecting the air gap, usually located next to the sink. Remove its cap and check for debris. A blocked air gap can prevent proper drainage. If connected to a garbage disposal, verify the knockout plug is removed. This plug is often overlooked during installation and blocks water flow.
| Component | Action Needed | Potential Issue |
|---|---|---|
| Air Gap | Clean inside | Debris blockage |
| Garbage Disposal | Remove knockout plug | Drainage blockage |
| Pipes | Check for secure fit | Loose connections |
| Cap | Verify proper placement | Misalignment |
| Disposal Unit | Inspect for clogs | Food waste blockage |
Address these issues for a more efficient dishwasher.
Test the Drain Pump for Malfunctions
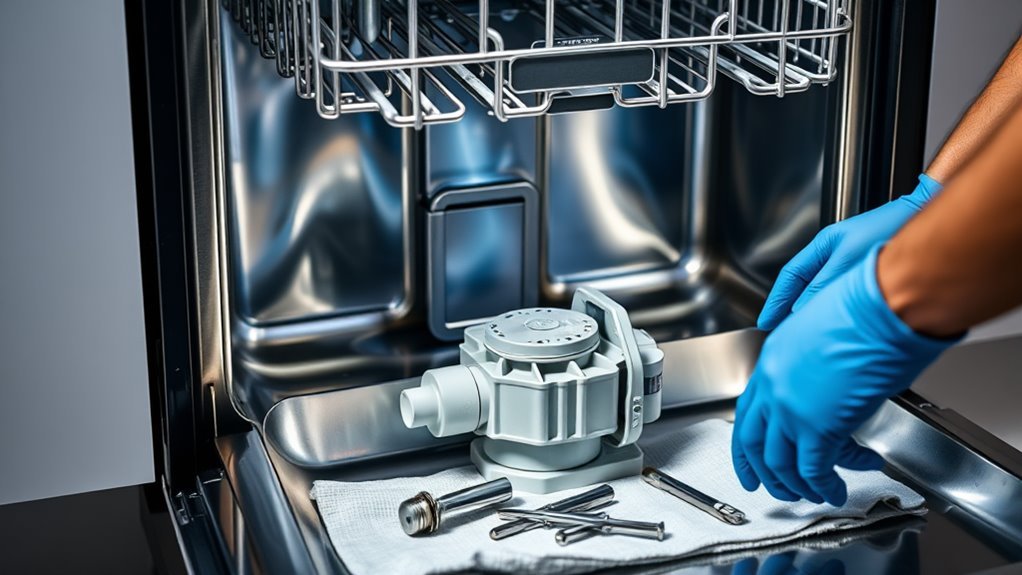
Although it may seem intimidating, testing the drain pump for malfunctions is an essential step in resolving drainage issues in your Maytag dishwasher. Start by unplugging the appliance to guarantee safety.
Remove the lower kick panel to access the drain pump. Carefully disconnect the wires and use a multimeter for electrical testing. Check for continuity; a lack of it indicates the pump might’ve failed. If that’s the case, consider pump replacement as a solution.
When testing, listen for unusual noises that might suggest mechanical failure. Ascertain the pump’s impeller moves freely, free from obstructions.

Investigate the Dishwasher’s Drain Valve
With the drain pump thoroughly examined, your next step is to investigate the dishwasher’s drain valve.
Start by disconnecting power to guarantee safety. Access the valve, usually located near the motor.
Begin your drain valve troubleshooting by checking for any visible obstructions or damage. Manually move the valve to see if it opens and closes smoothly. If it’s stuck or malfunctioning, it’s likely impairing proper drainage.
Consult your valve replacement guide to determine if a replacement is necessary. Obtain a compatible valve from a trusted supplier, allowing you the freedom to fix it yourself.
Carefully install the new valve, verifying all connections are secure. Reconnect power, and test the dishwasher to confirm the issue is resolved.
Clean and Clear the Sump Area
A crucial step in guaranteeing your Maytag dishwasher drains effectively is to clean and clear the sump area. Start by turning off the dishwasher and disconnecting the power. Access the sump by removing the lower dish rack and unscrewing the cover. Use a flashlight to inspect for debris like food particles or broken glass obstructing the sump. Utilize a mixture of vinegar and water for cleaning techniques that dissolve residue and sanitize the area, guaranteeing efficient sump maintenance.
| Task | Tool Needed |
|---|---|
| Remove debris | Flashlight, gloves |
| Clean with vinegar solution | Vinegar, cloth |
| Reassemble components | Screwdriver |
Once the sump is clear, reassemble the components and restore power. This proactive measure guarantees a freely draining dishwasher, enhancing its performance.
Assess the Float Switch for Proper Operation
To guarantee your dishwasher drains correctly, start by inspecting the float switch mechanism for any signs of damage or wear.
Make certain there are no obstructions preventing the float from moving freely, as this can affect its ability to regulate water levels.
If you find any debris or blockages, carefully remove them to restore proper function.
Inspect Float Switch Mechanism
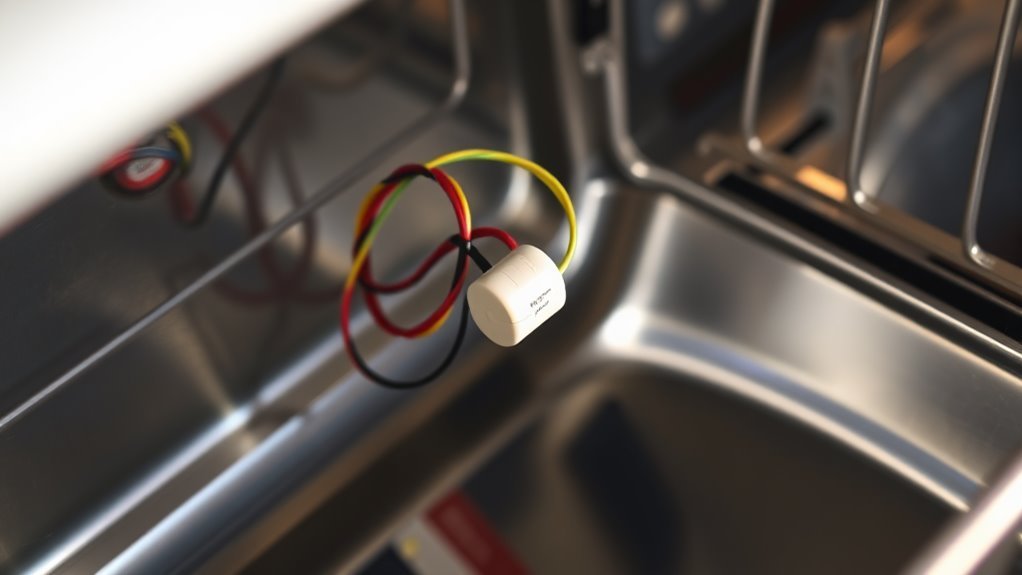
While tackling the issue of a Maytag dishwasher not draining, inspecting the float switch mechanism is critical.
Begin by locating the float switch inside the dishwasher tub, typically near the bottom. This component regulates water levels, and any malfunction could lead to drainage issues.
Gently lift the float to verify it moves freely; if it doesn’t, debris could be causing a jam. For float switch troubleshooting, use a multimeter to test for electrical continuity.
If the switch fails this test, float switch replacement may be necessary to restore proper function.
Check for Obstructions
Having inspected the float switch mechanism, it’s time to turn your attention to checking for obstructions within your Maytag dishwasher.
Begin by examining the clogged filter. A blocked filter can prevent water from draining properly, so remove it and clean away any debris.
Next, inspect the drain hose for kinks or blockages, ensuring it’s free of obstructions.
Also, check the dishwasher’s pump. If debris is lodged there, it could halt drainage.
Don’t overlook potential faulty wiring issues. Loose or damaged wires can interfere with the drainage system’s functionality.
With a keen eye and methodical approach, you can address these issues and restore your dishwasher’s performance.
Verify the Dishwasher’s Drain Cycle
To guarantee your Maytag dishwasher drains properly, start by checking the drain cycle settings to confirm they’re correctly configured.
Next, inspect the drain hose connection for any kinks or obstructions that might impede water flow.
Finally, listen for any unusual drain noises during the cycle, as these can indicate blockages or mechanical issues requiring attention.
Check Drain Cycle Settings
The drain cycle settings are essential in guaranteeing your Maytag dishwasher drains properly.
Start by examining the selected cycle settings. Sometimes, the wrong settings can prevent the dishwasher from entering its drain cycle.
Here’s what you should do:
- Guarantee correct cycle selection: Choose a cycle that includes draining. Some cycles might skip this step.
- Check for delays: Confirm if a delay start option is enabled, as this pauses all operations, including draining.
- Verify cycle completion: Make sure the cycle runs fully. Interruptions may prevent draining.
Taking control of these settings empowers you to avoid unnecessary delays and guarantees your dishwasher operates efficiently.
Inspect Drain Hose Connection
One essential step in verifying your Maytag dishwasher drains correctly is inspecting the drain hose connection.
Start by disconnecting the power to the dishwasher for safety. Carefully pull out the dishwasher to access the drain hose, typically found at the back.
Check for kinks or bends, as these can cause connection issues and impede proper drainage. Confirm the hose is securely attached to both the dishwasher and the sink drain or garbage disposal.
A loose connection could result in leaks or inadequate drainage. If you notice any damage or blockage, replace the hose immediately.
Listen for Drain Noises
Curious if your Maytag dishwasher’s drain cycle is functioning correctly? Start by listening for drain noises during the cycle. The absence of these sounds can indicate a drainage issue.
To verify the drain cycle, follow these troubleshooting techniques:
- Run a Short Cycle: Select a quick wash and listen closely. You should hear a consistent, smooth draining sound.
- Check for Obstructions: Open the dishwasher mid-cycle and inspect the drain area for blockages. Objects can hinder the draining noise.
- Test the Pump: Manually activate the drain pump by holding the cancel button. You should hear the pump engage immediately.
Using these methods, you can pinpoint issues efficiently, ensuring your dishwasher drains freely and restores your sense of control over kitchen maintenance.
Evaluate the Dishwasher’s Control Board
Inspecting the control board is essential when diagnosing a Maytag dishwasher that won’t drain. First, disconnect the dishwasher from power to guarantee safety.
Open the control panel by removing the screws securing it. Examine the control board for any visible damage or burnt spots, which could indicate control board issues.
Carefully inspect electrical connections, verifying they’re secure and not corroded. Loose or faulty connections might prevent the drain pump from receiving power.
Use a multimeter to test the control board’s circuits for continuity. If any readings are off, it may necessitate replacing the control board.
Addressing these potential issues grants you the freedom to tackle the problem head-on, restoring your dishwasher’s functionality and ensuring your appliance runs smoothly again.
Consider Professional Assistance If Needed
If your troubleshooting efforts haven’t resolved the drainage issue, it might be time to contemplate professional assistance. Knowing when to call an expert can save you from potential headaches and guarantee your dishwasher functions smoothly.
Look for these signs of malfunction:
- Unusual noises: Grinding or banging sounds could indicate a more serious mechanical issue.
- Persistent water pooling: If water remains after a cycle, despite attempts to clear clogs, professional help is advisable.
- Error codes: Consistent error messages on the control panel may require specialized knowledge to interpret and fix.
Hiring a professional guarantees precise diagnosis and repair.
Conclusion
You’ve navigated the necessary steps to solve your Maytag dishwasher’s drainage dilemma. From filtering flaws to hose hindrances, you’ve examined every element meticulously. By testing the pump and scrutinizing the valve, you’ve guaranteed smooth sailing for your soiled dishes. If the float switch or drain cycle still stumps you, don’t hesitate to hand the task to a professional. Trust your technical tenacity, and you’ll soon see sparkling success in solving your dishwasher’s draining drama.