

For efficient Ninja blender maintenance, start by unplugging before disassembling. Clean the jar, lid, and blades with mild dish soap, using a bottle brush for hard-to-reach areas, and dry thoroughly. Reset by unplugging and holding the power button for 10 seconds. Troubleshoot issues by verifying secure connections, reset the power, and check for motor or blade problems. Ensuring proper use and regular checks can prevent malfunctions and enhance longevity. Discover more to tackle any challenge.
Key Takeaways
- Disassemble and wash all blender parts with mild soap and warm water after each use to prevent residue buildup.
- Unplug the blender and reset by holding the power button for 10 seconds for troubleshooting.
- Replace dull or damaged blades to maintain smooth blending performance.
- Securely plug the blender into a functioning outlet and ensure the lid is properly attached.
- Regularly inspect seals, gaskets, and power cord for wear and replace if necessary.
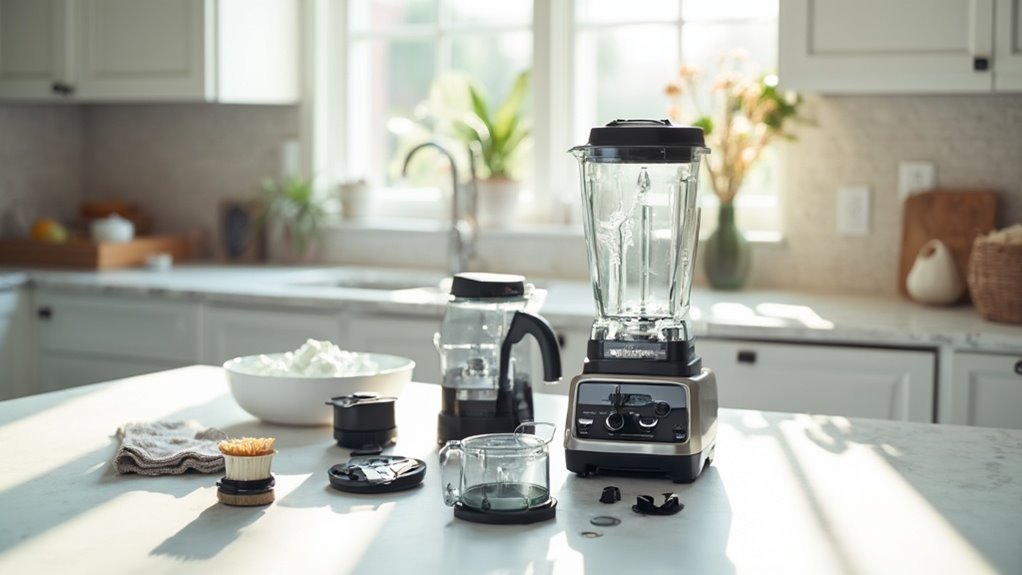
Essential Tools for Cleaning Your Ninja Blender
When maintaining your Ninja Blender, having the right cleaning tools is essential for guaranteeing peak performance and longevity.
Begin by gathering specific cleaning supplies like a bottle brush, mild dish soap, and a microfiber cloth. These tools will help you effectively clean all components without causing damage.
To maintain your blender's efficiency, establish a regular maintenance schedule. This guarantees you're addressing residue build-up before it affects functionality.
After each use, promptly wash the pitcher and blades with warm soapy water to prevent stubborn stains. Use the bottle brush for those hard-to-reach areas.
Wipe down the base with a damp microfiber cloth, avoiding excess water near electrical components.
This proactive approach will keep your blender running smoothly, allowing you the freedom to blend with confidence.
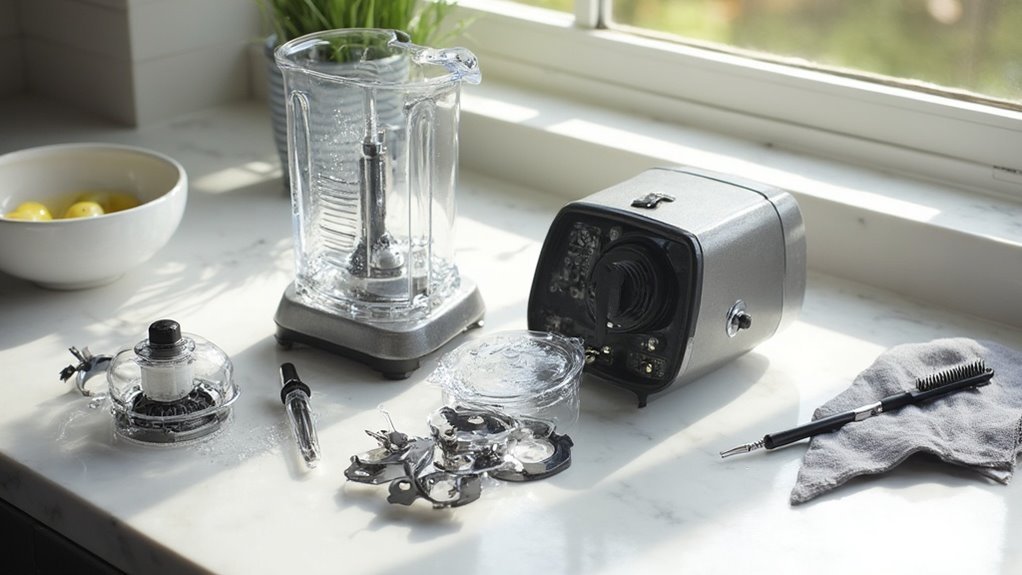
Step-by-Step Guide to Disassembling Your Blender
To begin disassembling your Ninja blender, start by unplugging it to guarantee safety.
Next, carefully remove the pitcher, blade assembly, and lid by following the manufacturer's instructions to avoid damaging any components.
Once cleaned, reassemble the parts securely to maintain peak performance and longevity.
Removing Blender Components
Start by unplugging your Ninja blender to guarantee safety while you work. Identify each blender component for proper disassembly. The base, pitcher, lid, and blade are your primary focus. Carefully twist the pitcher counterclockwise to release it from the base. Lift it off gently to avoid damaging the drive socket.
Here's a quick component identification and replacement guide:
| Component | Action | Note |
|---|---|---|
| Base | Leave intact | Contains electrical parts |
| Pitcher | Remove | Supports blending tasks |
| Lid | Detach | Confirm seals are intact |
| Blade | Unscrew carefully | Replace if dull or damaged |
Detach the lid by pulling it upwards, confirming seals remain intact. Unscrew the blade assembly carefully. If any component shows wear, refer to a component replacement guide. This process guarantees efficient maintenance and freedom from malfunction.
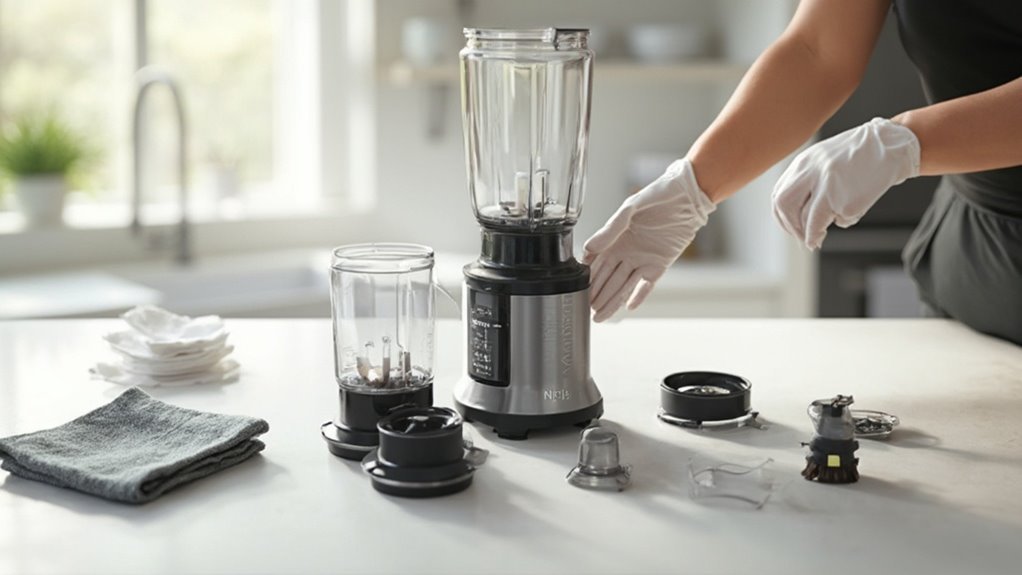
Safely Reassemble Parts
Having successfully disassembled your Ninja blender, it's time to focus on safely reassembling its components.
Begin by aligning the blade assembly with the base, making certain it sits securely. Use safe handling techniques, keeping fingers clear of sharp edges.
Next, position the pitcher on the motor base, aligning the arrows or notches to lock it in place. Check that the lid fits snugly, securing the release button if applicable.


Confirm all parts are tightly connected, preventing leaks or operational issues. Reassembling parts requires precision, so take your time and verify everything clicks into place.
If any pieces feel loose, double-check their alignment. This attention to detail guarantees your blender operates efficiently, granting you the freedom to blend effortlessly once more.
Proper Techniques for Cleaning the Blender Jar and Lid
To guarantee your Ninja blender jar and lid remain spotless and odor-free, start by rinsing them immediately after use to remove residue.
Use a mild detergent and a soft brush to scrub all surfaces, paying special attention to seals and crevices where food particles may linger.
Finish by thoroughly drying each component to prevent mold and odor accumulation.
Effective Washing Methods
Maintaining your Ninja blender's efficiency starts with mastering effective washing methods for the blender jar and lid.
Begin by establishing a regular cleaning frequency; after each use is ideal to prevent residue buildup.
Utilize these washing techniques: first, rinse the jar with warm water immediately after blending to remove large particles.
Next, fill it halfway with warm water and a few drops of dish soap, then pulse for 30 seconds. This self-cleaning action targets stubborn remnants.
For the lid, disassemble any removable parts and scrub gently with a soft brush under warm, soapy water.
Rinse thoroughly and air dry.
Avoid abrasive sponges to maintain your blender's pristine condition.
These precise steps guarantee your blender remains ready for your next culinary adventure.
Preventing Odor Build-up
With effective washing methods in place, tackling odor build-up becomes your next task to guarantee a fresh-smelling Ninja blender.
Start by thoroughly rinsing the blender jar and lid with warm, soapy water immediately after each use. For stubborn odors, create a cleaning solution using equal parts of water and white vinegar. Allow this mixture to sit in the jar for 5-10 minutes, then rinse thoroughly.
To secure complete odor prevention, dry the components completely before storage. Leaving them slightly open allows air circulation, which is essential.
Implement these storage tips by storing your blender in a cool, dry place, avoiding confined spaces that trap odors.
Following these steps diligently empowers you to maintain a pristine, odor-free blender, safeguarding your culinary freedom.
How to Safely Clean the Blades and Base
When cleaning the blades and base of your Ninja blender, prioritizing safety is essential to prevent accidents. Start by unplugging the blender to guarantee blade safety.
Remove the blades carefully, holding the base to avoid direct contact with sharp edges. Clean the blades with a soft brush or sponge, using mild soap and warm water. Rinse thoroughly and let them air dry.
For the base, wipe it with a damp cloth, avoiding excessive moisture near electrical components.
Establish a regular cleaning frequency by washing the blades and base after each use to maintain peak performance. This habit not only guarantees hygiene but also extends the lifespan of your appliance.
Tips for Removing Stubborn Stains and Odors
Although it might seem challenging, tackling stubborn stains and odors in your Ninja blender is manageable with the right approach.
Start by filling the blender halfway with warm water and a few drops of dish soap. Run the blender on high for 30 seconds.
Fill your blender halfway with warm water and dish soap, then blend on high for 30 seconds.
For tougher stain removal, create a paste using baking soda and water. Apply it to the stained area, let it sit for 15 minutes, then scrub gently with a soft brush.
For odor neutralization, blend a mixture of equal parts water and white vinegar, or lemon juice, on high for one minute. Rinse thoroughly with warm water.
Regularly repeating these steps guarantees your blender stays fresh, granting you the freedom to create without lingering odors or stains.
Resetting Your Ninja Blender: A Simple Guide
After confirming your Ninja blender is spotless and odor-free, you may encounter situations where a reset is necessary to restore peak performance.
Start by unplugging your blender to safely initiate the resetting process. Hold down the power button for about 10 seconds to discharge any residual power. This step is vital for resetting settings and clearing minor glitches.
Once completed, plug the blender back in. If your blender's still not functioning effectively, consider troubleshooting errors by checking if all components are correctly assembled. Misalignment can often lead to performance issues.
Common Troubleshooting Tips for Power Issues
Encountering power issues with your Ninja blender can be frustrating, but with some troubleshooting tips, you can often resolve these problems swiftly.
First, verify the blender is correctly plugged into a functioning outlet. Electrical issues can sometimes be as simple as a loose connection. Perform a power reset by unplugging the blender for 30 seconds and then plugging it back in.
Here are some steps to follow:
- Check the power cord: Inspect for any visible damage that might cause interruptions.
- Test the outlet: Plug another appliance into the same outlet to confirm it delivers power.
- Inspect the reset button: Some models have a reset button you can press to restore function.
- Examine the fuse: If your model has a fuse, verify it's intact and replace if blown.
Solutions for Blade and Motor Malfunctions
When your Ninja blender experiences blade and motor malfunctions, it's crucial to diagnose and resolve these issues efficiently to guarantee peak performance.
Start by performing a thorough blade replacement if you notice dull or damaged blades. This guarantees smooth blending and reduces strain on the motor.
Next, conduct a motor inspection by unplugging your blender and removing the base. Check for any visible damage or obstructions, and verify that all components are securely connected.
Unplug your blender, remove the base, and inspect for damage or loose connections.
If the motor overheats or emits unusual noises, it may require professional repair. Address minor issues promptly to prevent further damage.
Preventative Measures to Extend the Life of Your Blender
Once you've addressed blade and motor issues, it's important to focus on preventative measures to keep your Ninja blender running smoothly.
Start by refining your usage habits and guaranteeing proper blender storage. Maintain a clean, dry environment for your blender to prevent moisture damage.
Follow these tips:
- Seal the Lid Properly: Always guarantee the lid is tightly sealed before blending to prevent leaks.
- Avoid Overfilling: Stick to the maximum fill line to reduce stress on the motor and blades.
- Pulse Function Use: Use the pulse function for tough ingredients to avoid overheating the motor.
- Regular Inspection: Periodically check for wear and tear, like cracks or dull blades, to address issues early.
These practices will grant you the freedom to enjoy your blender for years to come.
Conclusion
You've now mastered the art of Ninja blender maintenance. Who knew that keeping a high-tech kitchen gadget in top shape required more than just pressing a button? But hey, isn't it ironic that the key to enjoying those flawless smoothies and soups lies in the meticulous care and cleaning of the very tool that effortlessly whirls them up? With these expert tips, you're not just maintaining a blender; you're extending its life while avoiding kitchen chaos.